为 React Router 做贡献
感谢您的贡献,您太棒了!
在开源世界中,可以做出许多不同类型的贡献,所有这些贡献都是有价值的。以下是一些指导方针,应该能帮助您准备贡献。
开放治理模式
在继续之前,请阅读开放治理的博客文章和文档,了解我们如何在 React Router 中处理 Bug/问题/功能提议。
设置
在为代码库做贡献之前,您需要 fork 该仓库。根据您所做贡献的类型,这会略有不同
- 所有新功能、Bug 修复或任何涉及
react-router代码的修改都应从dev分支创建并合并到该分支 - 仅涉及文档的更改可以从
main分支创建并合并到该分支
以下步骤将帮助您为该仓库贡献更改
-
Fork 仓库(点击此页面右上角的 Fork 按钮)
-
在本地克隆您的 fork
# in a terminal, cd to parent directory where you want your clone to be, then git clone https://github.com/<your_github_username>/react-router.git cd react-router # if you are making *any* code changes, make sure to checkout the dev branch git checkout dev -
安装依赖并构建。React Router 使用 pnpm,所以您也应该使用。如果使用
npm安装,将会生成不必要的package-lock.json文件。
认为发现了 Bug?
请遵守问题模板,并提供一个最小且可运行的复现。最好是提交一个带有失败测试的拉取请求。其次是提供一个指向 StackBlitz、CodeSandbox 或 GitHub 仓库的链接,以说明该 Bug。
问题未受关注?
如果您需要修复一个 Bug,但没有人来修复,最好的办法是自己提供一个修复方案并提交拉取请求。开源代码属于我们所有人,推动它前进是我们共同的责任。
提议新的或更改的 API?
⚠️ 请不要一开始就为新功能提交 PR。
新功能需要经过开放治理模式中概述的流程,可以通过在 GitHub 上开启一个提案讨论来启动。请提供深思熟虑的评论和一些示例代码,展示您希望在您的应用中如何使用 React Router。如果您能在得出需要更改和/或添加什么的结论之前,先展示当前 API 对您的限制,这将有助于对话的进行。
我们从经验中得知,小型的 API 通常更好,所以除非当前 API 有明显的局限性,否则我们可能不太愿意添加新东西。话虽如此,我们总是渴望听到我们之前没有考虑过的情况,所以请不要害羞!:)
添加示例?
示例可以直接添加到 main 分支。从您的本地 main 分支克隆中创建一个分支。完成后,创建一个拉取请求并概述您的示例。
提交拉取请求?
拉取请求只需获得两位或以上协作者的批准即可合并;当 PR 的作者是协作者时,这算作一票。
dev 分支。您可以在创建 PR 时,在 "比较更改" 标题下方的下拉菜单中设置基础分支: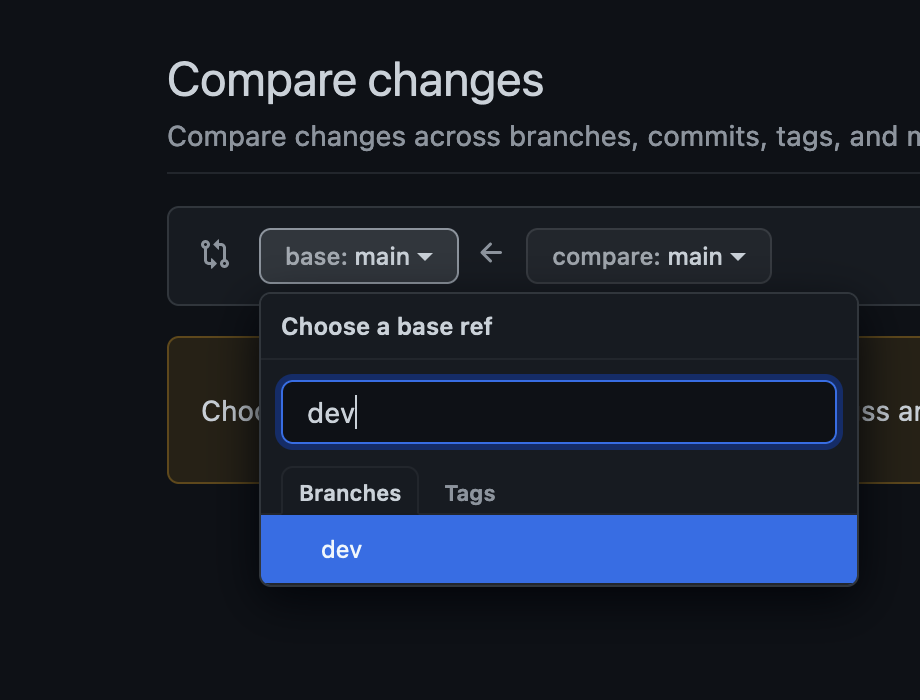
测试
所有修复 Bug 或添加功能的提交都需要一个或多个测试。
文档 + 示例
所有更改或添加 API 的提交都必须在一个同时更新所有相关示例和文档的拉取请求中完成。
文档位于 docs 目录中。一旦更改进入 main 分支,它们将自动发布到文档网站。
如果您想预览更改在文档网站上的效果,请克隆 react-router-website 仓库并按照 README.md 中的说明在本地查看您的更改。
开发
包
React Router 使用一个 monorepo 来托管多个包的代码。这些包位于 packages 目录中。
我们使用 pnpm workspaces 来管理依赖项的安装和运行各种脚本。要安装所有内容,请确保您已安装 pnpm,然后在仓库根目录下运行 pnpm install。
构建
在根目录中调用 pnpm build 将运行构建,这应该只需要几秒钟。将所有包一起构建非常重要,因为各个包之间存在依赖关系。
测试
在运行测试之前,您需要先运行一次构建。构建后,在根目录中运行 pnpm test 将运行每个包的测试。如果您想为特定的包运行测试,请使用 pnpm test packages/<package-name>/
# Test all packages
pnpm test

# Test only @react-router/dev
pnpm test packages/react-router-dev/
代码仓库分支
该仓库为不同目的维护不同的分支。它们大致如下
- main   > the most recent release and current docs
- dev    > code under active development between stable releases
- v6     > the most recent code for a specific major release
可能还有用于各种功能和实验的其他分支,但所有的关键操作都源于这些分支。
发布
有关发布流程的概述,请参阅 DEVELOPMENT.md。